Montessori Cursive Alphabet Cards
Disclosure: This post may contain affiliate links, which means we may receive a commission if you click a link and purchase something. Please check out our disclosure policy for more details.

A key component of Montessori primary education is that children learn to write in cursive first. I was initially surprised by this since traditional education teaches cursive writing later (if ever!). However once the philosophy behind it was explained, it made perfect sense. If you look at a young child’s scribbles, they usually consist of loops and wavy lines. Their writing flows from one shape to the next without lifting their pencil. Sound familiar?
Pre-writing naturally tends to mimic cursive. This is why the Montessori philosophy teaches cursive first – they believe it comes easier to young children.
Unfortunately I have found that cursive writing materials for preschool aged children are remarkably difficult to find. Most workbooks for this age group focus on printing letters. The few Montessori-endorsed materials I found were often very expensive and had to be ordered online.
When I brought this up with Goose’s teacher she helped me to devise a flashcard system that I could make on my own. After taking the time to create these fabulous flashcards, I just had to share them with you!
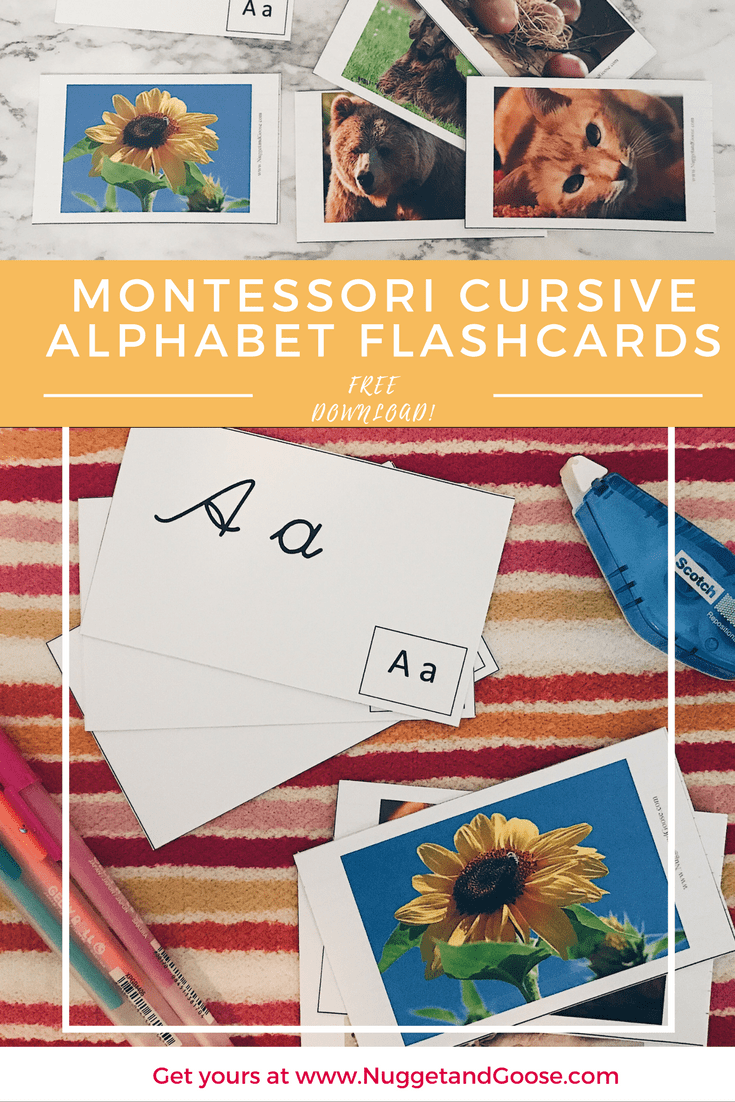
I designed my flashcards to fit on standard 3″ x 5″ note cards. Every flashcard features a front with an upper and lower case cursive letter, along with a small inset script letter. On the reverse is a large high resolution photograph of an animal or object that begins with that letter. I have even included an additional blank template in case you wish to replace an image with one of your own. It turned out to be much harder than I expected to come up with what I hoped would be a universally recognizable image for each letter. The last thing I wanted was for children to get confused because they saw ‘yak’ and thought ‘cow’ or saw a ‘yacht’ and thought ‘boat’. (So I went with Yogurt for Y which probably isn’t much better, but it is what it is.)
How to Assemble Your Flashcards

Assembly is very simple for these cards. Simply download and print the flashcards, cut out each card (It will go much faster with a paper cutter like this one from Swingline.) Then use a tape runner to adhere the front and back to a 3×5 notecard. If you wish to make your flashcards even more durable you could laminate them, which is what I did after taking pictures. Laminated items really don’t photograph well for me.
Using Your Flashcards

These flashcards have both the cursive letters as well as script letters on the front. The idea is to cover the script letter with your thumb and ask your child what sound the cursive letter shown makes. If your child is struggling, move your thumb to reveal the script letters. We see these so much in our society that many children pick them up naturally. Finally, show your child the object or animal on the back of the card so they link the ‘buh’ sound of the letter B with ‘bear’ etc. It may be helpful to note that in Montessori schools children do not initially learn the names of letters, they are called by the sound they make.
You can also use the flashcards in reverse by showing your child the picture first. Have him name the sound that the image starts with and then turn over the card to reveal the letters that make that sound.
OK, I’m sold. How do I get mine?
This is the best part – the flashcards are free! All you have to do is sign up below. You will then receive a link and password to my Free Digital Resource Library. You will never get spam from me but you WILL get access to an ever-growing library of printables, templates and more. What are you waiting for?


